This App works with Azure Storage Blob containers. You can find a full version of this guide on our blog.
Create a new Storage Accountin your Azure portal or use an existing one. Create a new private container, for example, blit-test.
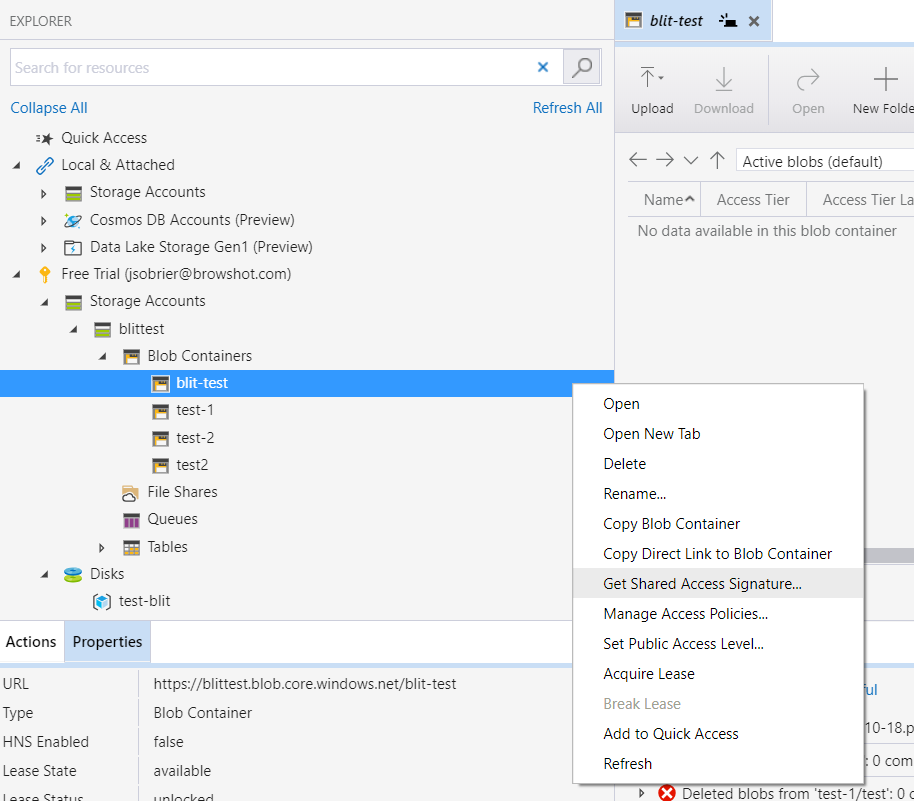
To give access to Blit to this container, you need to switch to Microsoft Azure Storage Explorer, available for Windows, Linux, and MacOSX. Open the software and look for the Blob Container you created. Right-click on it and choose Get Shared Access Signature.
Make sure you set the Expiry time far in the future.
Check the following permissions:
Then click on Create. The software will show the Shared Access Signatureinformation. Copy the URI that you will need to paste into your Blit App.
Once the Blob container has been created, and the Shared Access URI has been generated and copied, create a new Azure Blit App:
Then click on Verify. Blit will attempt to upload the image blit.png to the path specified. If there is a problem, an error message will be shown. You can also check if you see the file in your Azure container using the Azure Portal or the Microsoft Azure Storage Explorer portal.
Now that the App has been configured and verified, you can use it with new and existing captures.