
You can now get your screenshots uploaded directly to your cloud storage through Apps, including to your Azure storage container. You can use multiple containers for different captures or the same container with other folders or file names for each screenshot.
To start getting your captures uploaded to your Azure container, follow these steps:
- Create your Azure storage container
- Configure your App
- Use the App
Create your container
In your Azure portal, create a new Storage Account or use an existing one. Create a new private container, for example blit-test.
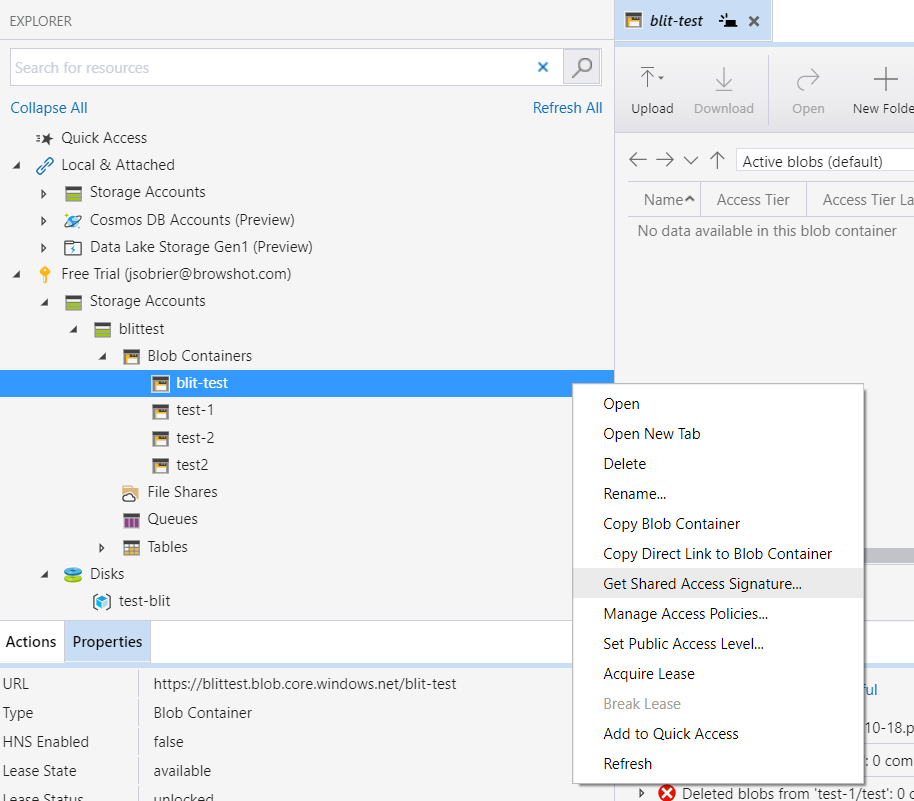
To give access to Blit to this container, you need to switch to Microsoft Azure Storage Explorer available for Windows, Linux, and MacOSX. Open the software and look for the Blob Container you created. Right-click on it and choose Get Shared Access Signature.
Make sure you set the Expiry time far in the future.
Check the following permissions:
- Read
- Add
- Create
- Write
- List
Then click on Create. The software will show the Shared Access Signature information. Copy the URI that you will need to paste into your Blit App.
Create an App
The left menu has a new entry for Apps. There, you will see all the Apps that you create. Click on Add an App.
Enter a name for your App. Choose Azure as type.
Enter the name of your container, such as blit-test.
Under Container URL with SAS token, paste the URL you obtained from Microsoft Azure Storage Explorer.
You can enter the custom folder and file names that will be used for each image. We support several variables to create dynamic paths. See our previous post for more details.
Before you save the App, click on Verify to make sure it is configured correctly. Blit will attempt to upload the file blit.png to the folder you specified. If an error occurs, we will display the error message we received from Azure.
Use the App
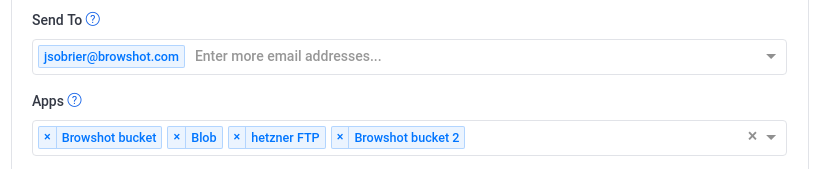
Your App will now show in the list of Apps. When you edit an existing capture or schedule a new capture, there is a new field for Apps. Click in the box to see the list of Apps available, or start typing its name to filter the list.
That’s it! Now your captures will be uploaded to your Azure container automatically. If there is any issue during the upload, we will send you an e-mail.
If you want to use different folders of files, you can create multiple apps with the same container.