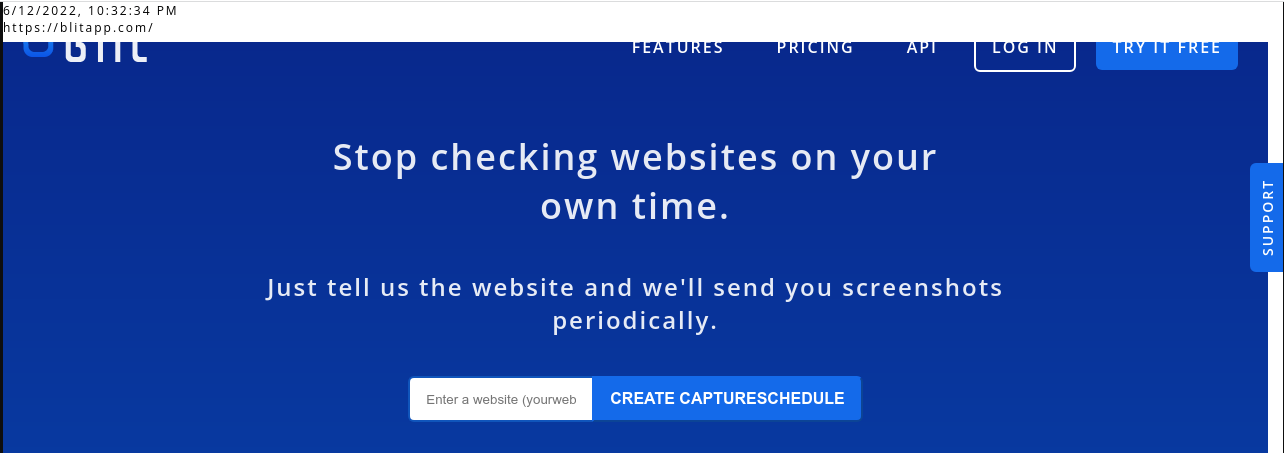
Customers sometimes ask us how to include a timestamp in the capture or the URL of the web page captured. You can achieve this by injecting Javascript into the target page to add the timestamp and URL directly on the page.
In your capture, under Advanced Web Page Options, click on Edit Javascript. You can add the code below:
(function() {
  var d = new Date();

  var date = d.toLocaleString("en-US", {
    timeZone: "America/New_York"
  });

  var div = document.createElement("div");
  var style = document.createAttribute("style");
  style.value = "position: fixed; width: auto; height: 40px;  top: 0; left: 0; right: 0; bottom: 0; background-color: White; z-index: 9999999999; color: Black; font-size: 12px;";
  div.setAttributeNode(style);

  div.innerHTML = date + "<br>" + document.location.href;

  document.body.append(div);
})();
This adds a a DIV, 40px high (height: 40px), with a white background (background-color: White) and black font (color: Black; font-size: 12px;). To ensure the DIV is at the forefront of the page, we add a high z-index (z-index: 9999999999). This DIV is placed at the top left corner of the page (top: 0; left: 0;).
Here is an example applied to https://blitapp.com/

You can customize the style of the DIV and change the timezone used for the date.